Galvanized Pipe Shelving
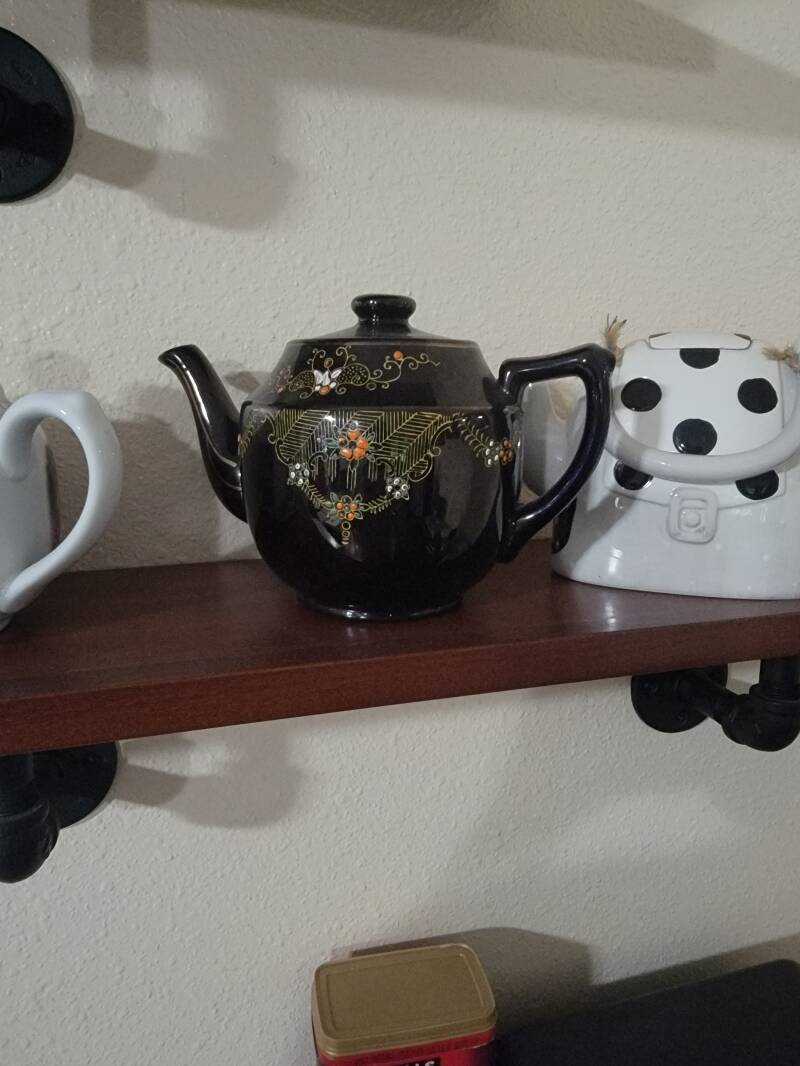
A few years back, when we were first getting settled into our new location and home, we decided that it was time to create a space specifically for a few of the tea pots we had collected over the years, one of them, and my favorite, found in an abandoned home almost 40 years ago!
As usual, the first challenge to be met was the design. Neither of us wanted anything too "high tech" since, having recently retired and having moved to a location that can best be described as "country living", "high tech" may look a bit out of place!
After kicking around a few ideas, we came up with the idea of trying to make shelving using lumber for the the shelves and galvanized pipe for the supports.
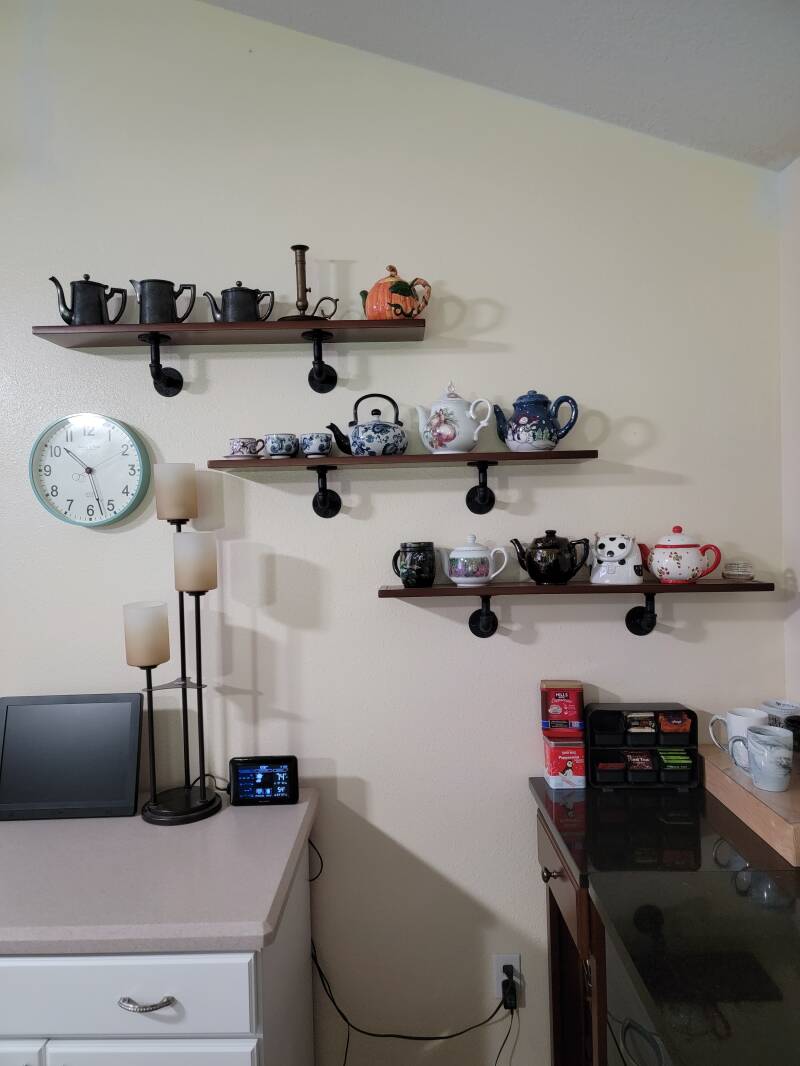
First we took the tea pots and a few other items and lined them up, measuring how much shelving would be needed to display the items we wanted to display. After that was determined, we decided on where we would like the display to be located in our home. Next, we determined the length of each shelf and how they would be "stacked", or arranged, in order to display all the tea pots!
Once the design, style, location and material was all decided, the fun part began...the building and installation of the shelving units.
I decided to use plywood for the actual shelving but to cut and attach a solid, hardwood edge on the plywood edge. The hardwood edge would be ever so slightly wider than the plywood in order to create a small lip to protect and keep the tea pots from slipping off of the shelf due to vibrations or whatever.
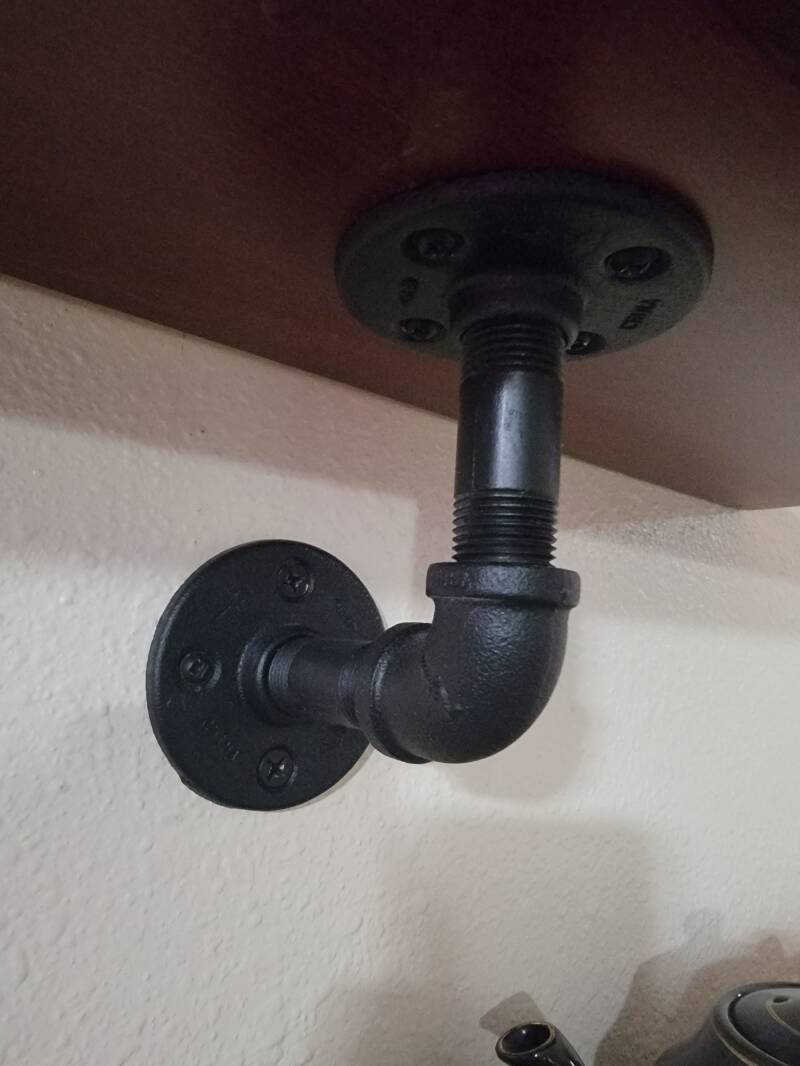
Building the shelving was a pretty straightforward and simple task so in a very short time, I was ready to stain and topcoat the shelving. While those processes were in the drying/curing stages, I started creating the shelving supports using the galvanized pipe.
The first step was to clean all the pipe really well due to there being a slight coating of a lubricant of some sort on it. Once I was satisfied that they were cleaned well enough, I painted each section with a flat black spray paint. Once the paint had dried, I began putting the sections together, trying to tighten them all to as close to the same tension in order to create level units in which to use as the supports.
I cannot speak to the cost of galvanized pipe today, but about six years ago, when I purchased the sections required for the shelving I was building, I had a bit of "sticker shock" at the cost of such a small amount of such a common material! However, it may have simply been that some of the sections I required were more expensive than the straight sections of pipe! All told, for the three shelves being built, I required 12 each of the flange units - the circular pieces that screw into the actual shelf and into the wall AND that the straight sections of pipe fit into. I also required six each of the 90 degree elbows which would be required to make the turn out from the wall and up to the bottom of the shelf. And last, I required 12 straight sections of 3" length pipe to tie everything together!
Overall, it was a fairly simple project but it really added a nice touch to our living room area AND, as a special bonus for me, I was able to display my favorite tea pot that I've had for about 40 years!
Below is a few pictures of the shelving and one picture of the tea pot that holds a really special spot in my heart! Hope you enjoy this article/description and if you have any questions, thoughts, or suggestions, please feel free to let me know!
Add comment
Comments