NOT a BRIGHT LITE!!!
I am generally the early bird in our family of two (just my wife and I and our dogs now!). Being as I am the early bird, one of my roles is to get the coffee going first thing! No, unfortunately I do NOT have any idea how strong I like my coffee, I only know the steps, measurements and volume my wife taught me to make, based on how SHE likes HER coffee! But, as I have been drinking it this way for years, I have become pretty well adjusted to it so, without really even trying, I can honestly say we both like our coffee the same! Except for the creamer part! I use regular creamer and my wife seems to prefer French Vanilla! Oh well, we are almost a perfect pair!
Anyway, being the first up in the morning has a few challenges, one is not being able to see what I'm doing at certain times of the year without having to turn on bright lights, which, early in the morning, is NOT one of my favorite things to do! As I was thinking about it one day, my mind drifted into a "what if" kind of state and, next thing I knew, I was developing, in my mind, a light source that I could live with...bright enough to help me see clearly but definitely NOT a BRIGHT LITE, surely nothing of the LED nature! Shortly thereafter, I was sketching drawings on a scratch piece of paper! I finally reached a point where I could at least "begin" to play with some wood to see what would work, what would be too large or awkward, and what would be bright enough, while not being too bright and so forth!
One of the my main challenges, regardless of the design, was how and where to mount the light! In order for me to have a light that helped me to see, without being annoying, I had to determine the where and how of mounting the end product! Even though, at that point, I had no "end product"!
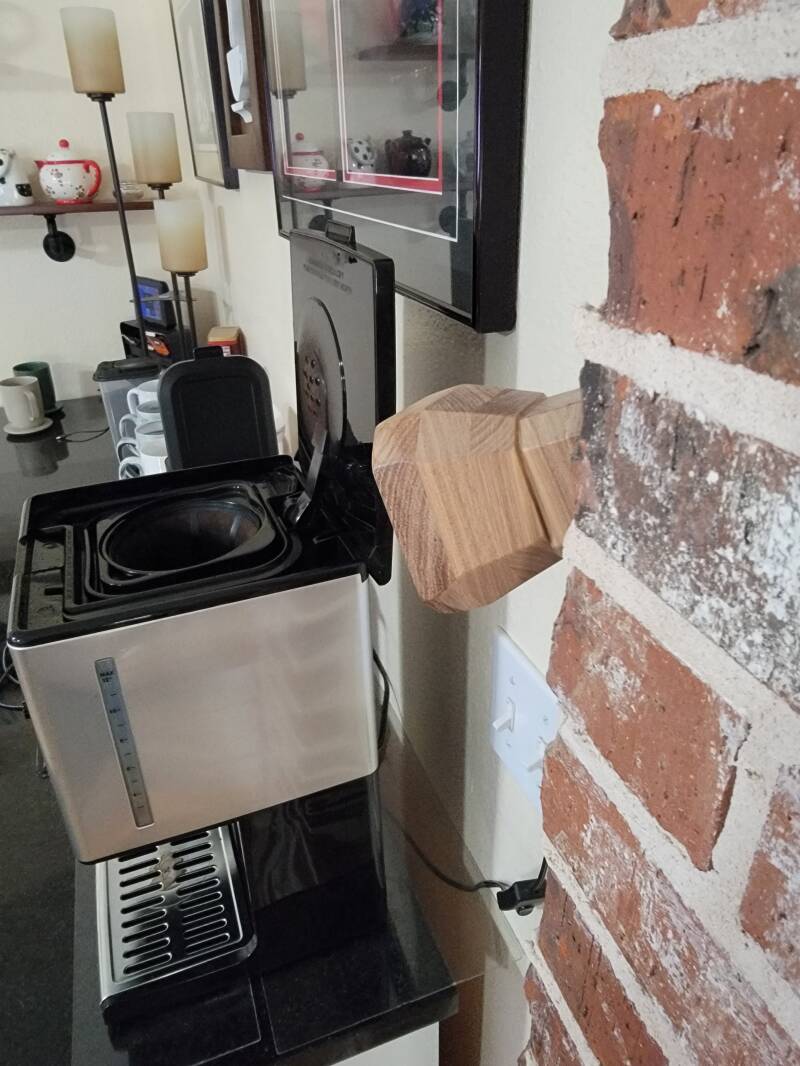
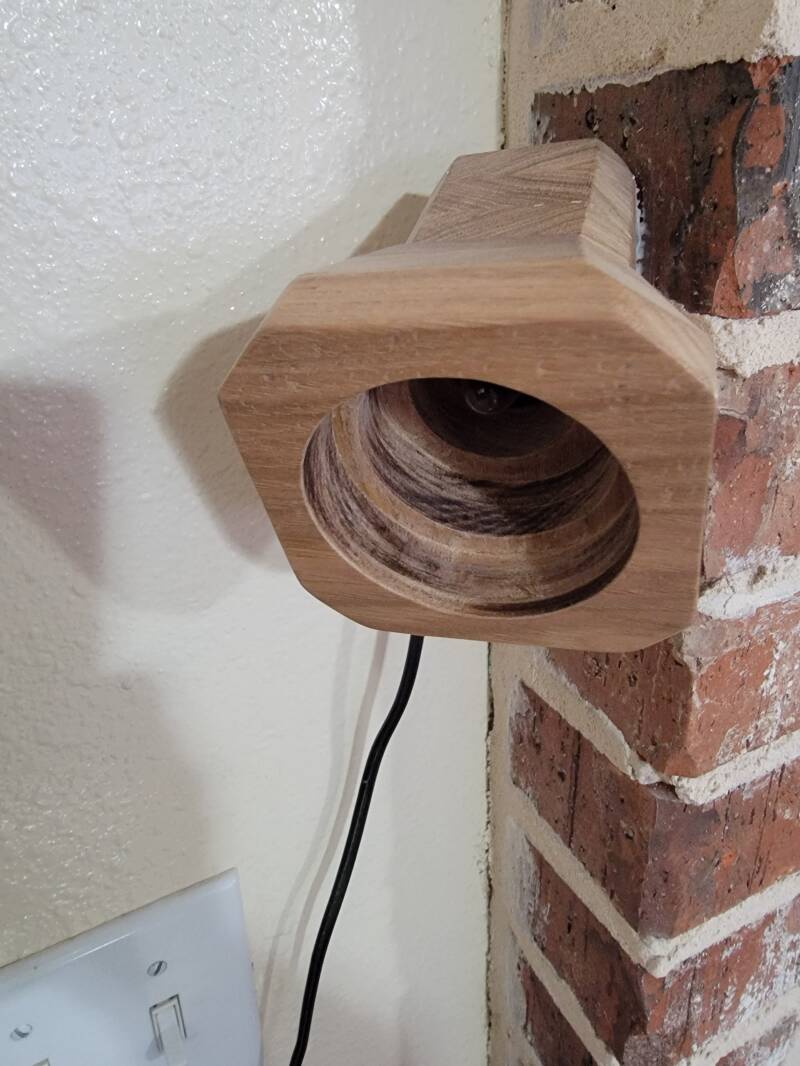
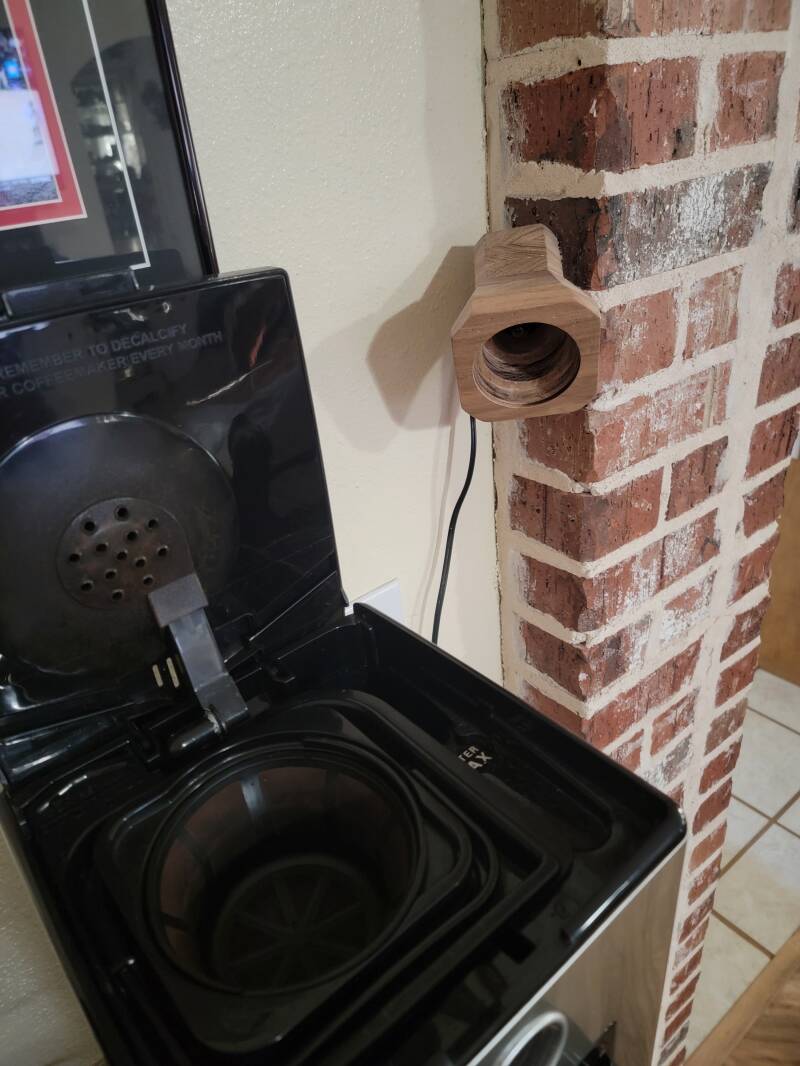
I determined it would be best if mounted at an angle, on the edge of a brick accent wall. Great! Now I could begin the actual building of the fixture. I first dug through all my salvaged and set aside electrical supplies and materials and found exactly the supplies required to make the light work. Now, I just had to build the fixture to hold the light and then mount it!
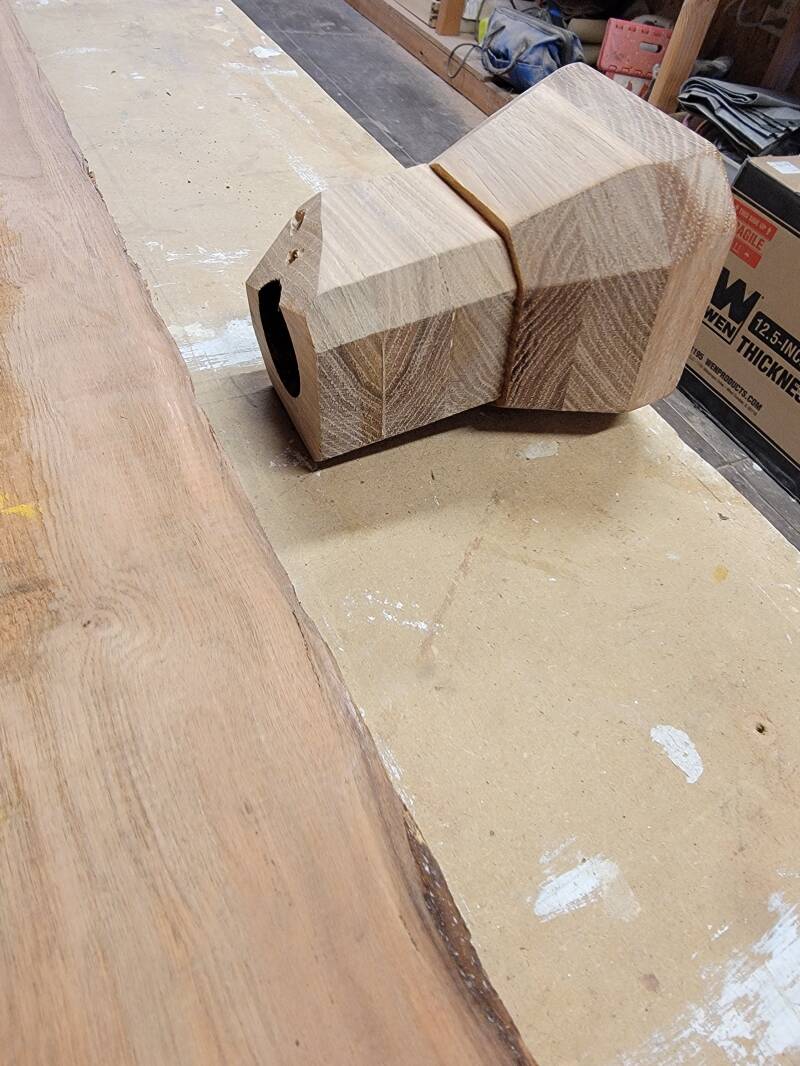
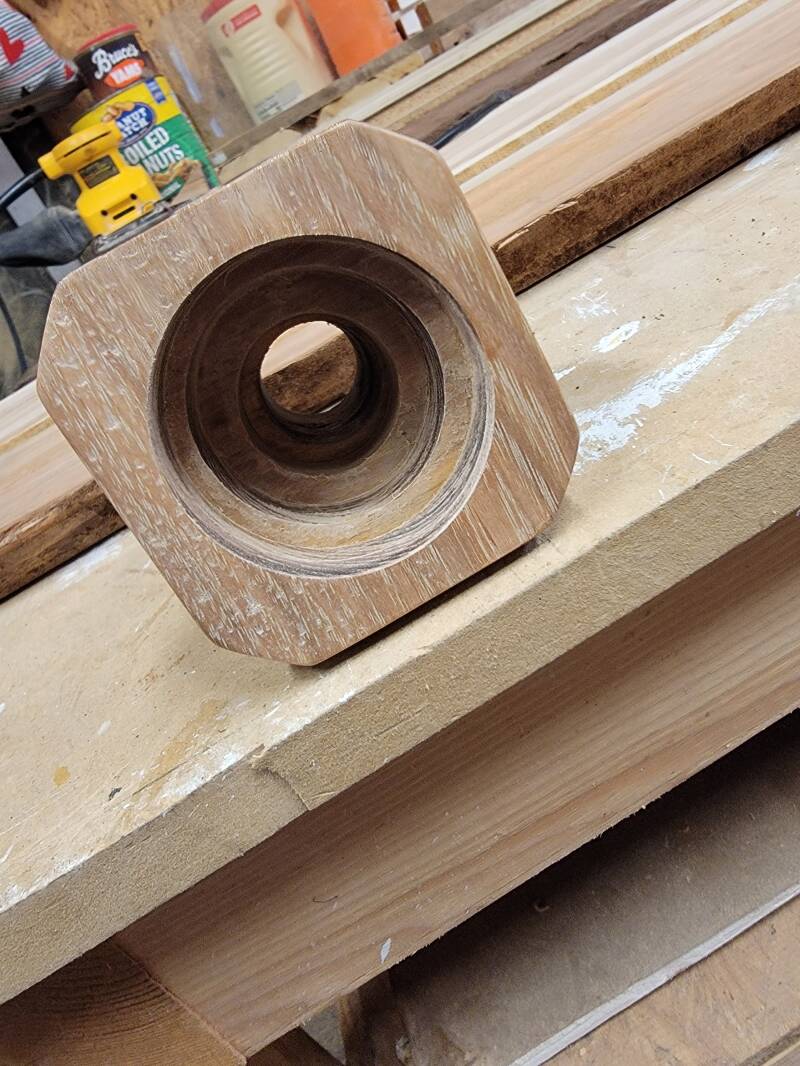
I began by selecting some Pecan wood for it's beauty! Next I created small blocks and bored holes through the center of the blocks! I then began testing them by attaching the blocks together to try to get a feel for if I was going in the right direction or not! Eventually, I was able to attach all the blocks using wood glue and leaving them alone to set up really well. I then was able to determine the angle where the fixture would be attached to the edge of the brick wall. I then threaded the electrical portion of the wiring where the light bulb would be inserted, into the light fixture. Since I had determined that I would need to use dowels to attach the fixture to the brick wall, I then had to bore a small hole, about 3/8" in diameter, into the back of the light fixture and another hole of matching diameter into the brick wall. I also had to ensure that the angle of the holes matched in order to get a nice, smooth fit!
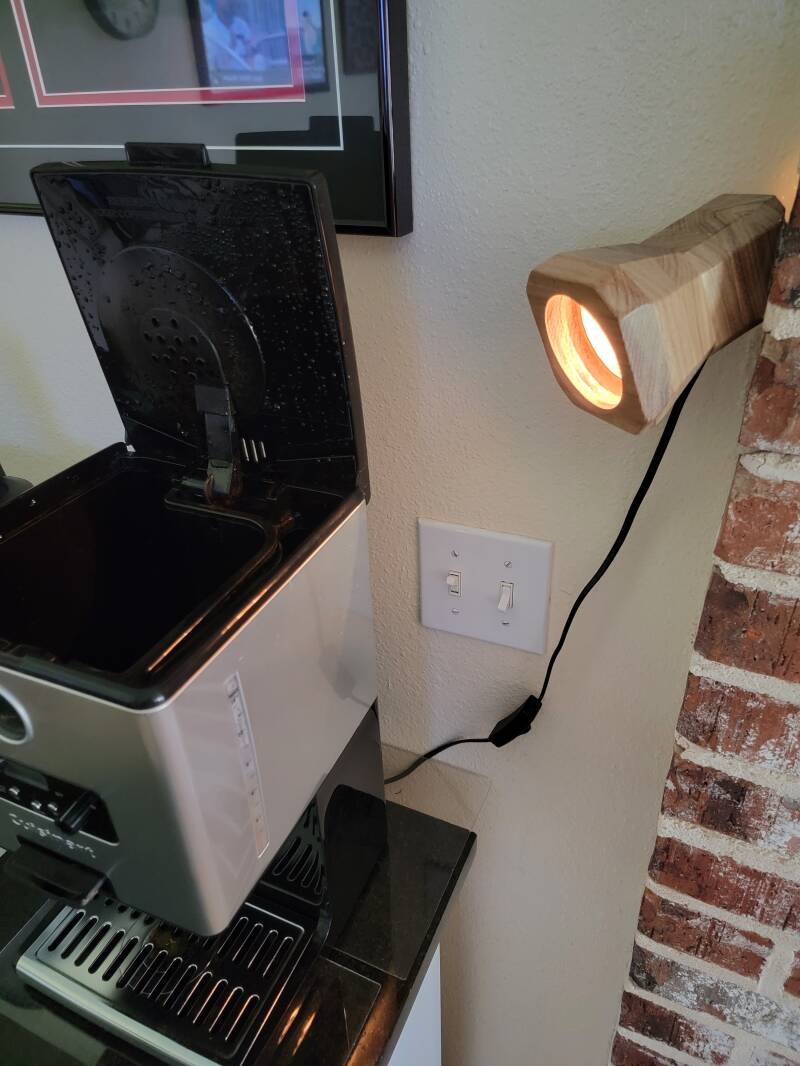
I then took the wiring I had installed into the fixture and inserted an incandescent bulb with an amber tone to it, very similar to a "night lite". I then placed some wood glue inside the hole at the back of the fixture and forced the wooden dowel into the fixture. Once it had set up overnight, I placed some Lock Tite or Silicone type of caulk into the hole I had drilled into the brick wall and took the fixture, with wiring and light installed and the wooden dowel installed and protruding about 1 1/2", and mounted that wooden dowel into the hole in the brick wall. NOTE: BEFORE I pushed the dowel all the way into the hole and flush to the brick wall, I spread some strong silicone caulk around the area where the fixture back would be contacting the brick wall. I did this only as some added security to make sure everything held tightly after setting up. The last step was taking some painter's tape and taping the fixture to the wall, again, just to ensure that nothing moved during the curing or "setting up" stage. The next day, I removed all the tape and felt the fixture to ensure it was secured solidly!
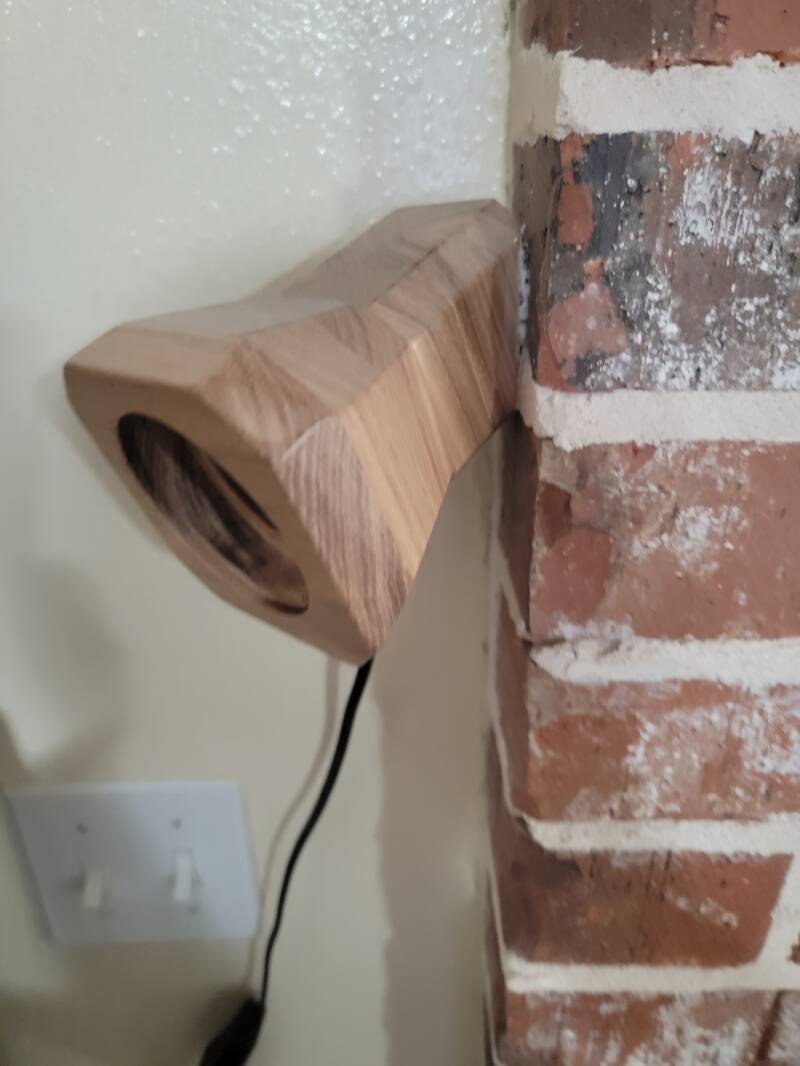
FYI: I did not stain the Pecan as it is such a pretty wood, although it is quite dense and heavier than most woods! I did, however, apply several topcoats of a water based clear finish. The finish I prefer, especially when not staining, is Wood Kraft Farrell-Calhoun Waterborne Interior Polyurethane Gloss Varnish 1190. It is absolutely THE BEST! I'll attach some pics below so you can see how the end product turned out! Also, another FYI, it works GREAT! Not terribly bright but gives plenty of light for me to make coffee early in the morning while, in certain months, the world is still a bit dark!
Hope you enjoyed the description, even if I did get a bit long winded! Also, hope it inspires you to imagine and create what you simply cannot find in stores OR on-line! It keeps the mind working and IT IS FUN!!!
Feel free to let me know what you think of this little project or if you have any questions or suggestions!
Add comment
Comments