One day in the not too distant past, I was browsing around on my computer and stumbled across some shelves that someone had built that caught my interest. Each small section of the shelving was it's own little hexagon! Pretty cool, huh!? I began searching for more of the hexagon shelves and discovered that none that I could find, were made specifically or exactly as I imagined I might enjoy building and displaying them! In time, I realized why!
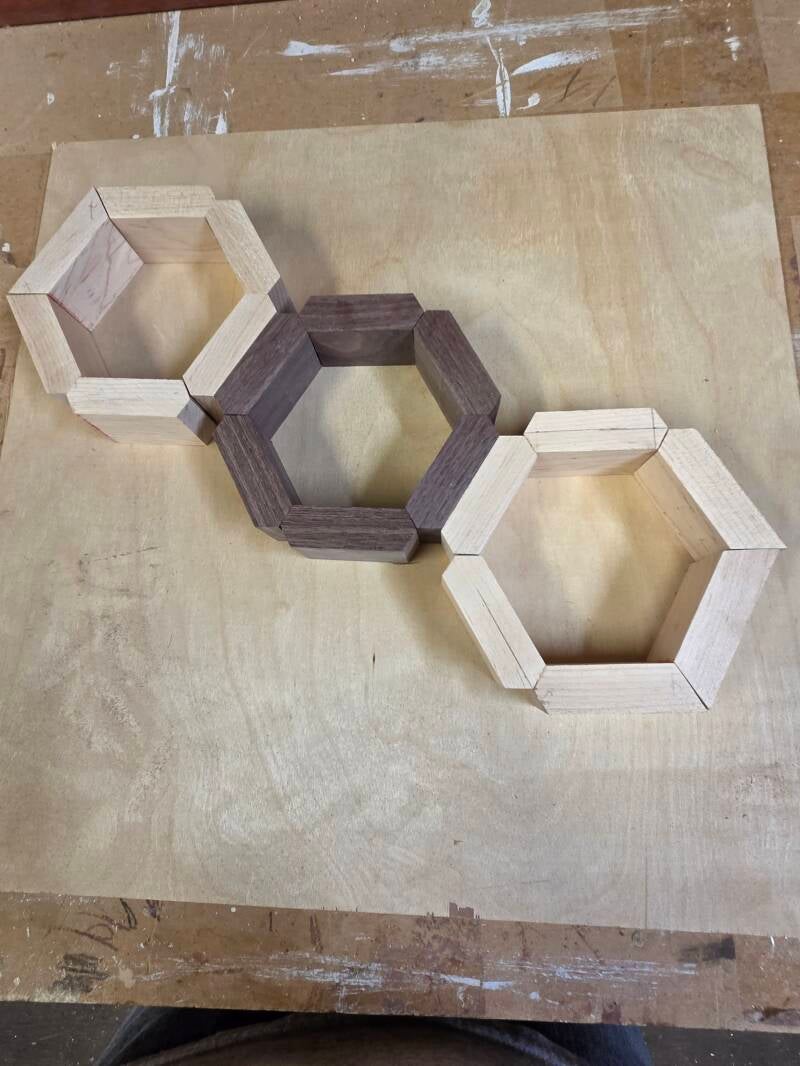
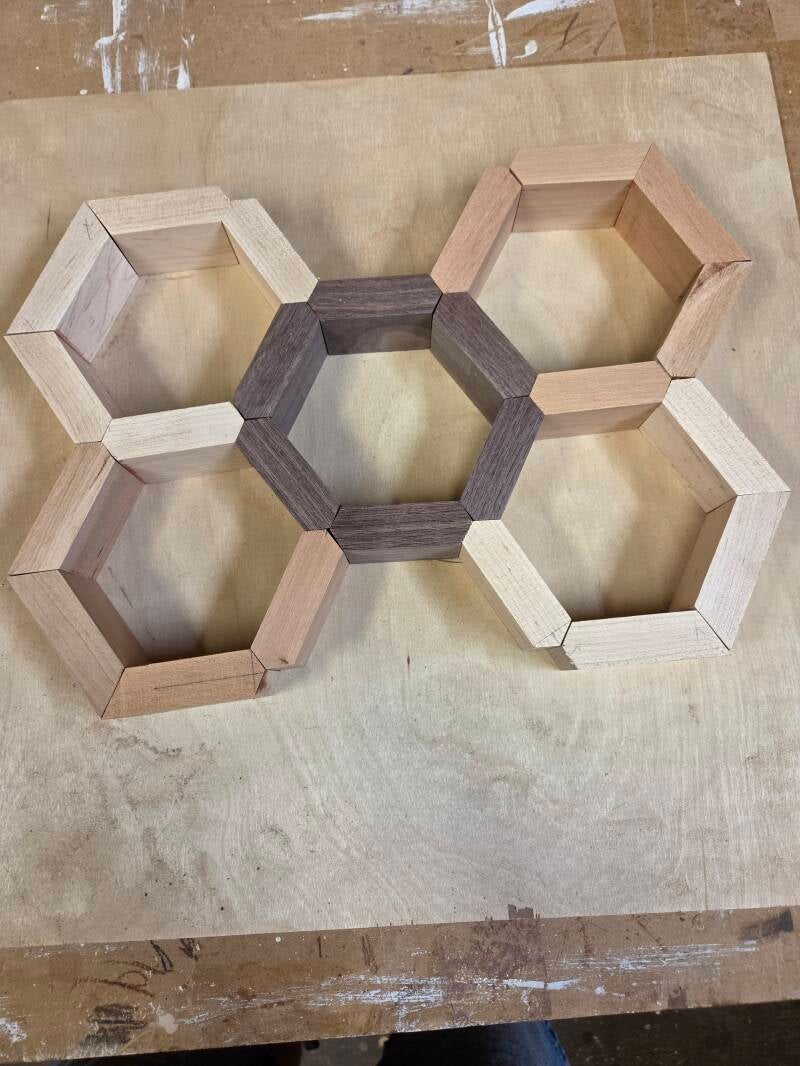
Most of the hexagon shelves were either stand-alone or multiple hexagons simply attached to other hexagons! Right from the start I just did NOT see the attraction in building them in that fashion. In about half the pictures, each hexagon was a free standing hexagon and was simply attached to another identical hexagon to create a multi-hexagon shelf. What that results in, is that you have a collection of attached hexagons. However, what I was disappointed to see in the end product was that ONLY the very outer edges of the attached hexagons were singular pieces. In other words, if they were built using 3/4" thick material, ONLY the outer edges were 3/4"! ALL of the inner pieces, where they were attached to another hexagon, was 1 1/2" thick! I just failed to see the attraction to that look and started doing a little more digging and finally came across some that were built whereas ALL sections were equal! If they were built using 3/4" material, each piece, the outer pieces, the inner connecting pieces, EVERY PIECE, was 3/4" thick! That was a much better look, in my opinion!
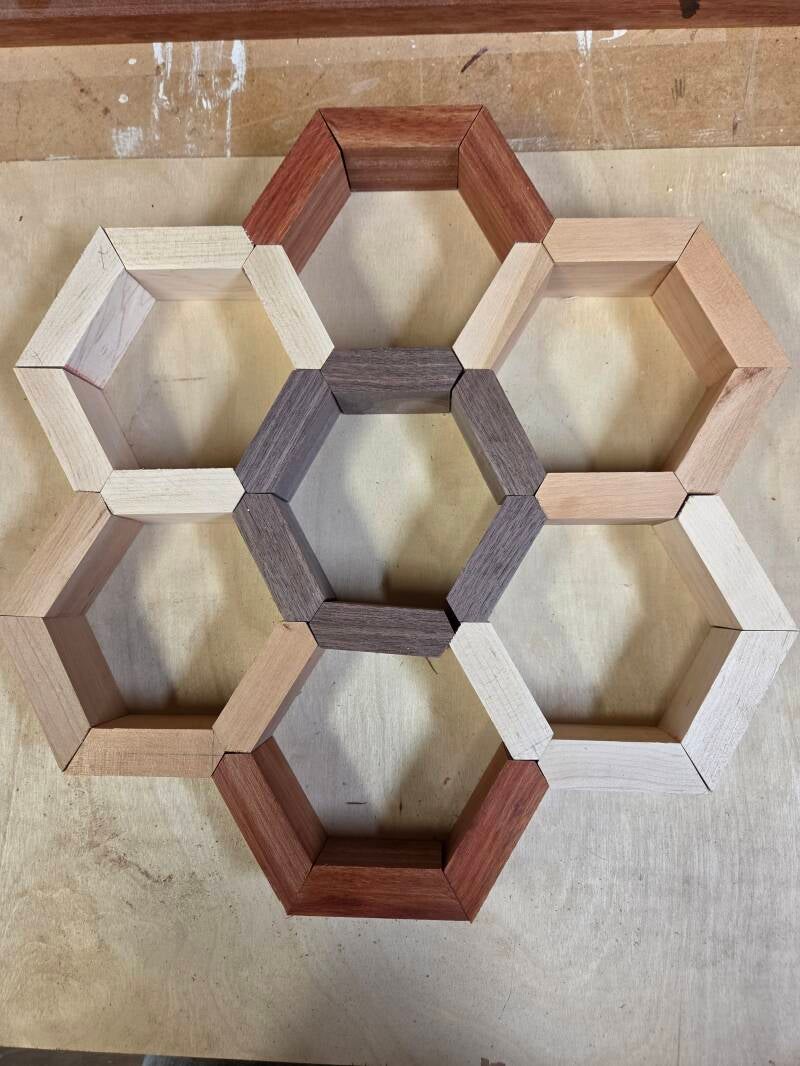
Not sure how I was so quickly able to create this end product in my mind, but practically from when I saw the first of the hexagon shelves, I was imagining not only ensuring all pieces were the same size, but that I could use at least four different wood species AND put glass fronts on them. You see, when I first saw these hexagons, I immediately started imagining displaying pictures with each hexagon, which meant the addition of glass fronts! Actually, I intended to use 1/8" plexiglass but you get the idea! All the hexagons I was finding on the internet were simply used to place an item, a tiny plant, a figurine or trinket. No glass front nor any backing was required!
What I learned quickly was that the likely reason others did not build their hexagons in the manner I was attempting to, was because the level of difficulty increased at least 110%! Again, that is just my opinion!
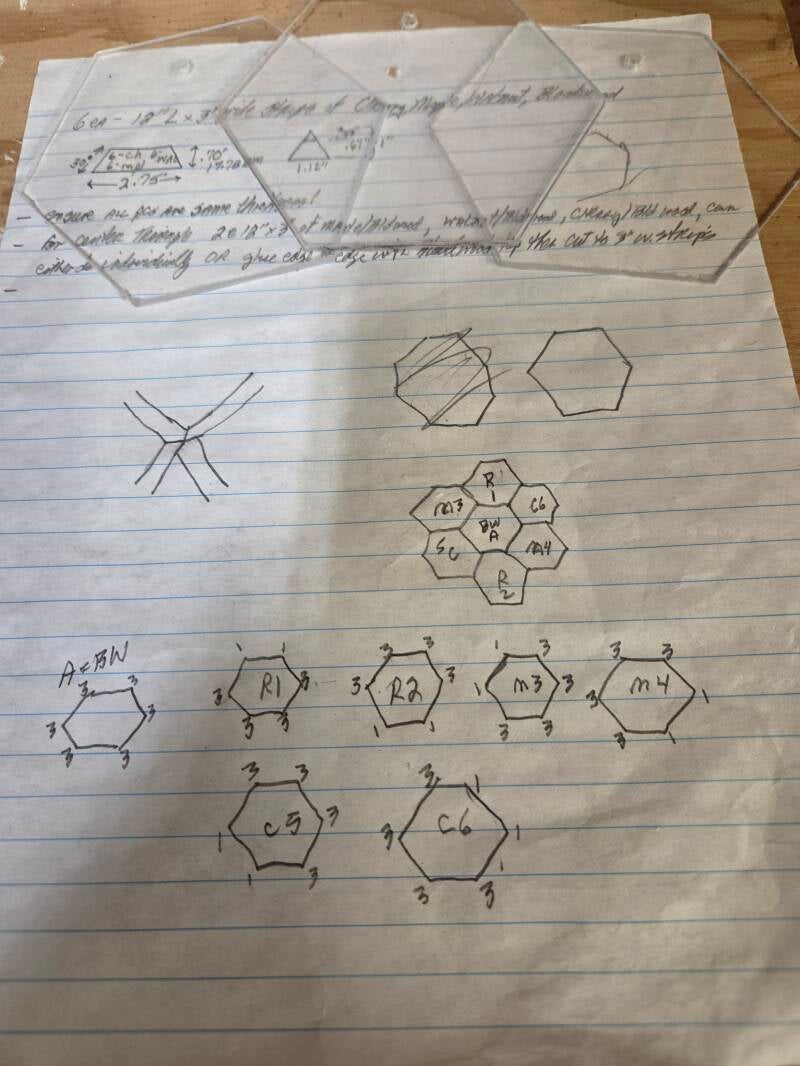
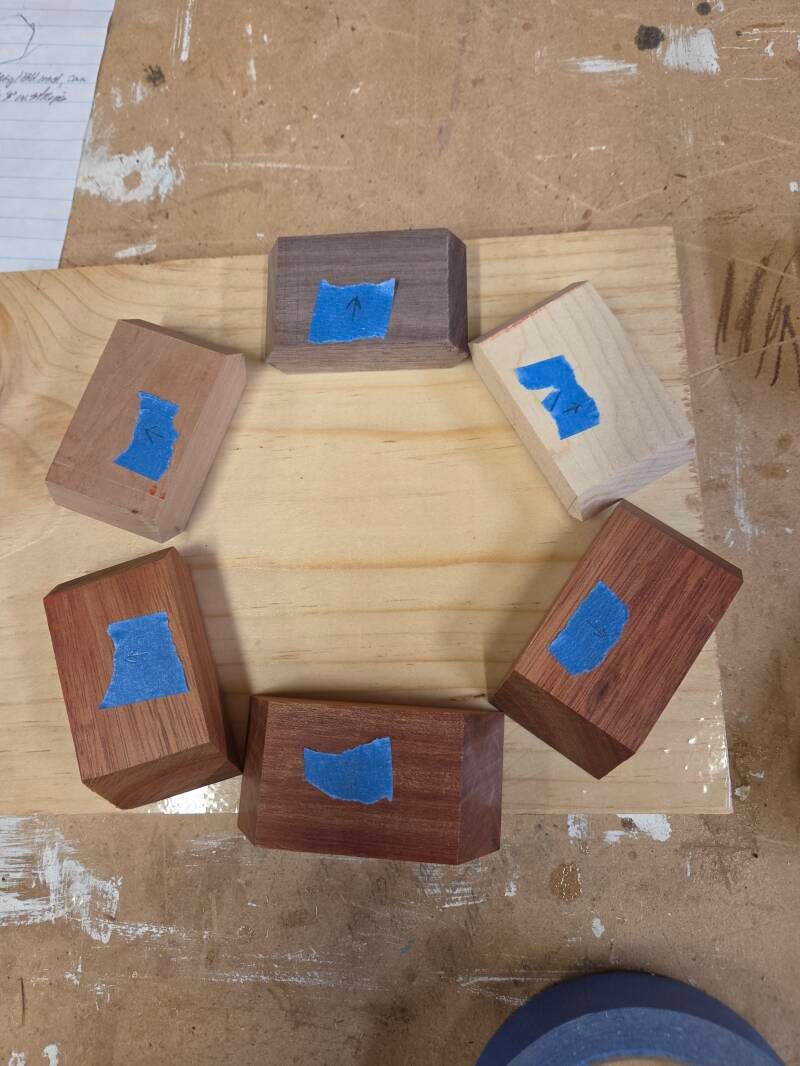
On some projects, I find that every step of the build must be carefully thought out, options considered and decisions made. I also find that it's necessary for me to draw out the end product I hope to create, labeling all areas such as wood species, where it fits into each hexagon and therefore into the overall scheme of the complete pattern! Often, as a project progresses, I find having these notes, "maps" and drawings detailed so completely truly help me to keep moving forward without having to stop and recut pieces or make additional, repetitive and unnecessary actions! For example, if a design, in this case hexagons, has 6 separate hexagons, each hexagon should be drawn out showing how/where they attach to another hexagon. As a hexagon has six sides, each side must be labeled. For example, Hexagon #1 Piece #1, #2, #3, etc. then on to Hexagon #2 Piece #1, #2, #3 and so on and on! Believe me, when you begin making cuts, all this detail will make a world of difference in giving you the confidence that you are moving in the right direction! Often I label items based on wood species. In some cases it just seems to make more sense and in other cases, not so much! As you will see in the pictures I will attach, I basically created, or drew, a pattern to help me maintain progress with confidence, not worrying about if I cut whichever item in the correct fashion.
While this attention to detail may seem a bit overboard, I assure you that it is well worth it, can possibly help avoid the wasting of material and can be referred to throughout the project and used again should you wish to build this project again! If you have ever built, or attempted to build, one of the 3D End Grain Cutting Boards that I'm sure you've seen on YouTube, you will fully understand the need for lots of clear, concise design, notes and details. I have built a number of items of that nature and it is amazing how, even with all this information on hand, one can easily make a mistake and place one item in the wrong location! Once that is done, that entire project has lost it's appeal, uniqueness and beauty, leaving you with nothing more than a flawed project!
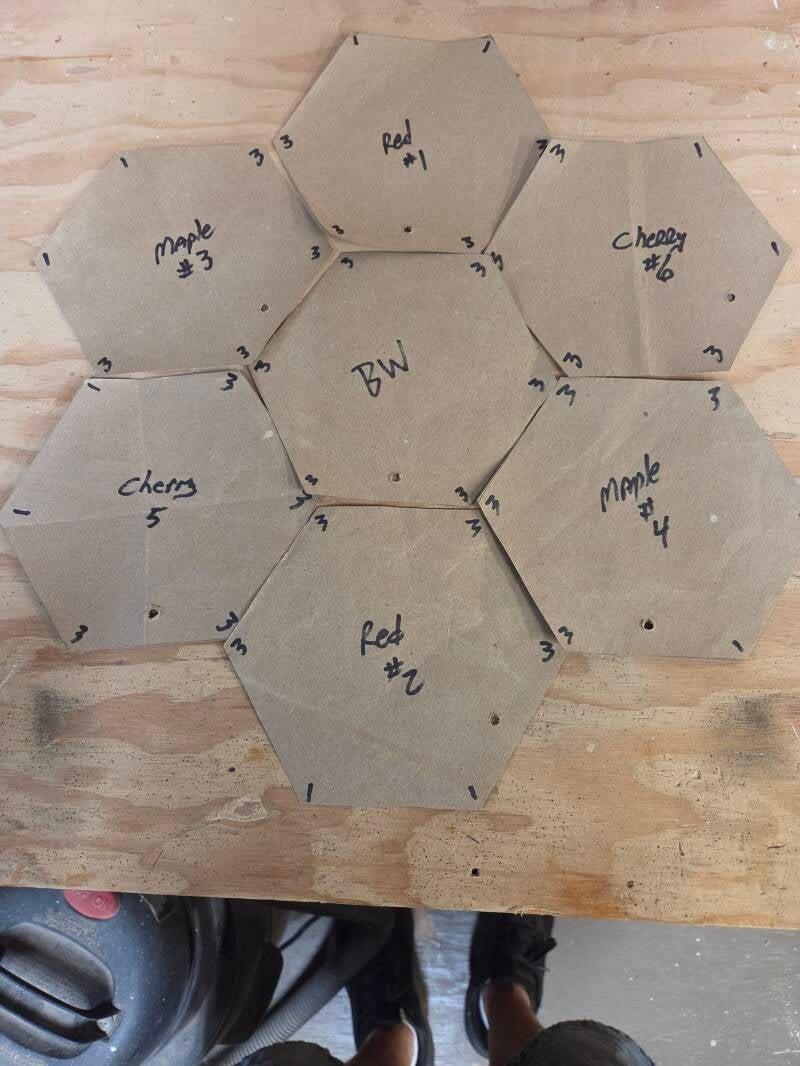
Also, you will notice how each hexagon has a 1 or a 3 at each corner of that particular hexagon. That simple numbering scheme reminds me and shows me which section gets how many cuts which will allow both the plexiglass towards the front and the 1/4" thick rear panel to be inserted. The number 1 simply means there is only one straight connecting piece while the number 3 indicates the locations where 3 sections of a hexagon will join. Those numbers dictate the locations and number of cuts I will make on that one specific location and that too will be shown in the pictures at the end.
I decided to use Blood Wood, which in the drawing I simply refer to as R for red because Blood Wood is VERY red! I also chose to use Cherry, shown as C, Maple, shown as M, and Black Walnut, shown as BW.
When looking at the finished product, there are any number of changes I would consider making were I to create another of these projects. However, there are so many other items I would like to build, need to build or have been asked to build that I am not sure when I will have the opportunity to build another of these hexagon shelving units.
Also, I created my design with one thing in mind, to display photos, my first thought being photos of all the wonderful, loving dogs we have raised, loved and lost over the years. With that in mind, the "depth" of my hexagons are only 1 1/2". The good news is that you can build yours any depth you want to, depending what your hexagons will be used for!
I must admit, having no input from anyone about this project and only relying on past experience to create a path towards accomplishing it, I find it much harder to try to get all the information into words so that anyone can easily reproduce what I feel has turned out to be a beautiful hexagon photo display, similar to a shadow box! So, with that in mind, please feel free to add comments below, ask any questions you may have, any suggestions you may have or ask about any projects you may be planning around your home! If I don't have the answer, I will do my best to put you in contact with those that do have the answer!
Create Your Own Website With Webador